Project Manager for Excel organizes, prioritizes and tracks all the tasks associated with your various Projects. To create a new Project, click the New Project tool on the Projects menu tab. If you just want to start with an empty project, enter the name of your project, select how you want to sort the project tasks and click OK. You can also create your project using a previously saved Project Template. (See the Templates topic for more details on creating and using Project Templates.) To utilize an existing template, just select the Template you want to use from Project Templates drop down list. Otherwise leave the selection blank to create a new empty project.
If you utilize a template to create your project, you can choose a start date by entering it into the Start Date field. This date will be used as the start date for the earliest task in the project, with the start dates and due dates for the remaining tasks being set relative to this initial start date. Click OK to create the new project.

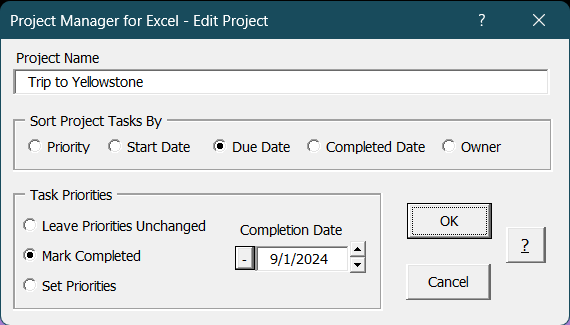
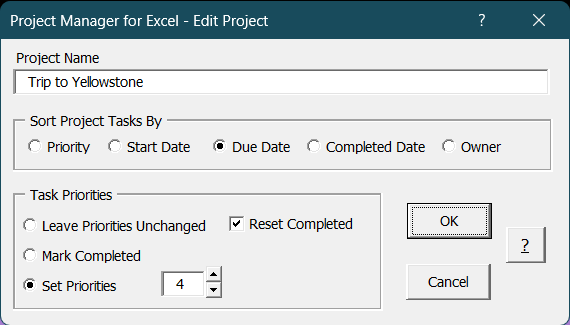
To edit an existing project, select the project you wish to edit and click the Edit Project tool or double-click on the Project name. This will display the Edit Project form show below. You can rename the project by entering a new project name and change the sort option for the tasks in your project. You can also change the priorities for all the project tasks or mark all the project tasks completed by selecting the appropriate option. If you are marking all the tasks completed, you have an option to enter a completion date for all the tasks. You can also reset all the completed tasks in the project to not completed by checking the Reset Completed checkbox. When changing task priorities or marking them completed, all the tasks in the project will be changed accordingly. If you want to change only a single task, select a cell in the row corresponding to the task you want to edit and click the Edit Task tool.
You can elect to delete all the completed tasks in a Project by using the Delete Completed tool in the Project Tasks section of the Projects menu tab. You will be prompted to confirm the deletion. Just click OK to continue and delete all the completed tasks or Cancel to abort the operation. You can also Show or Hide the completed tasks for a project by clicking the appropriate tool on the Projects menu tab. These functions act only on the selected project, not the entire Projects sheet.


To sort the tasks in a particular project, select a cell somewhere within the project or project tasks and click the Sort Tasks tool. Just select the sort option you would like to apply and click OK If you want all the projects sorted using this option, check the Sort all Projects Using this Option checkbox. To delete a project, select the project you want to delete and click the Delete Project tool.

You can use the Export Projects tool to save a copy of your Projects worksheet as a separate Excel file. Just click the tool and wait a second or two and an exact copy of your Projects worksheet will appear. You can save it as a separate file for a record of all your projects at that point in time.
Visit Checkbook on Facebook
Visit Handicap Manager on Facebook